RFQ to supplier bill
This guide follows the standard Purchase, Inventory, and Accounting handoff. Your approval process may add steps outside Cayamanan or through custom modules.
1. Prepare the RFQ
Open Purchase, choose Requests for Quotation, and select New. Choose the vendor. Add products, quantities, agreed unit costs, taxes, expected arrival, and the vendor’s reference when available. Confirm the currency and delivery destination.
An RFQ is still a draft request. Use your organization’s purchasing approval before making a supplier commitment.
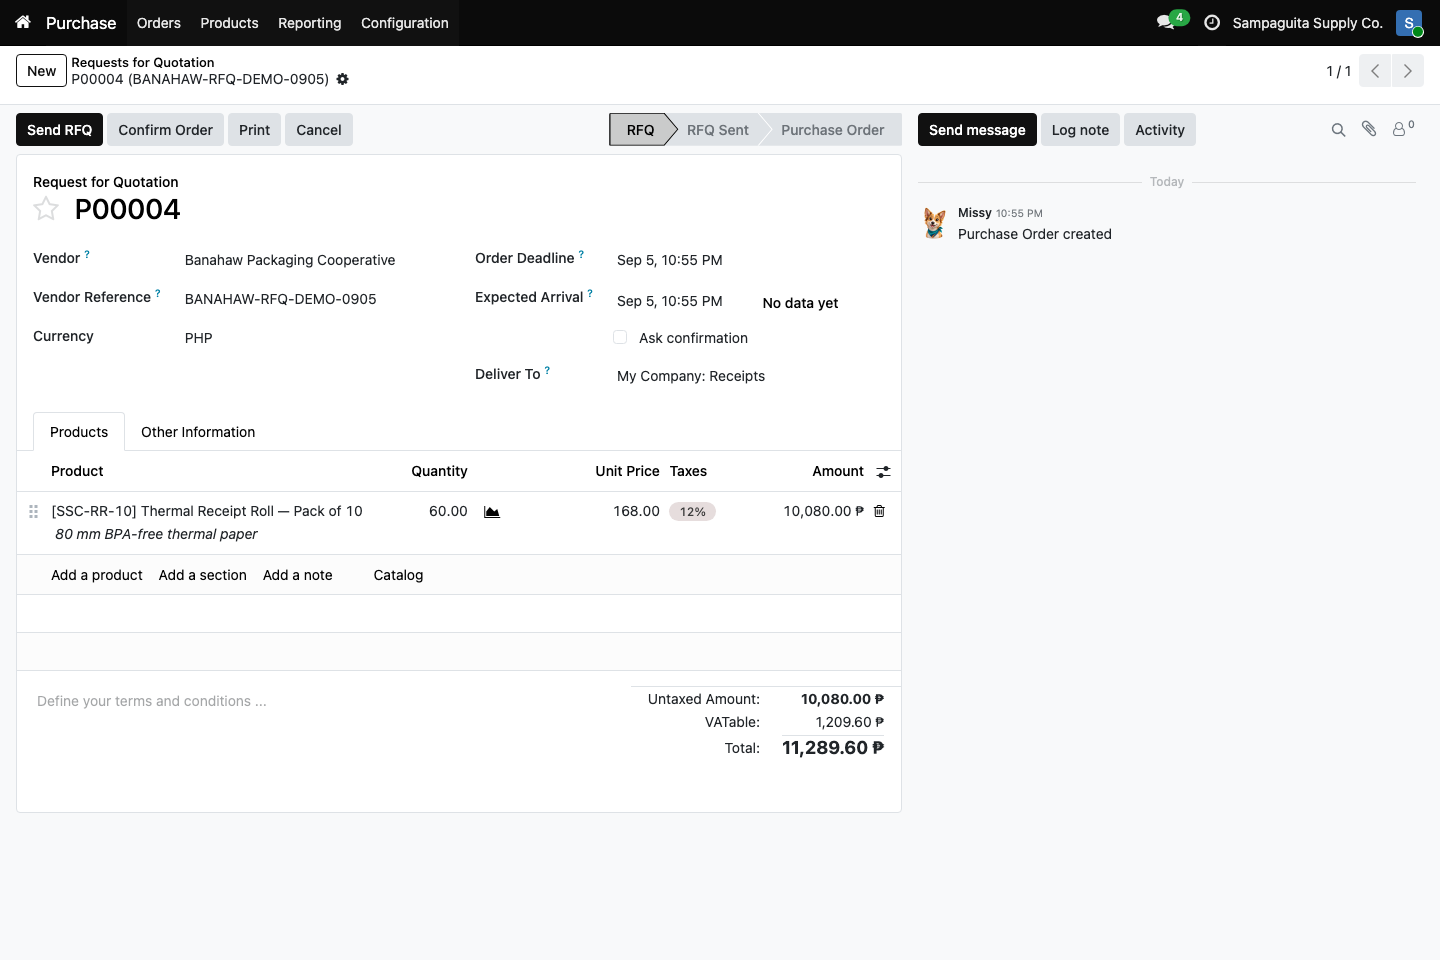
Request for quotation P00004 in the approved fictional demo company.
Open the image for the full-resolution original.
You should now see: the RFQ stage, supplier, vendor reference, expected arrival, delivery destination, product line, tax, and total. This is still a request; it does not show an approved purchase commitment.
2. Confirm the purchase order
Confirm the RFQ when the supplier and internal approver agree. It becomes a Purchase Order. With Inventory installed, a Receipt smart button links to the expected incoming movement.
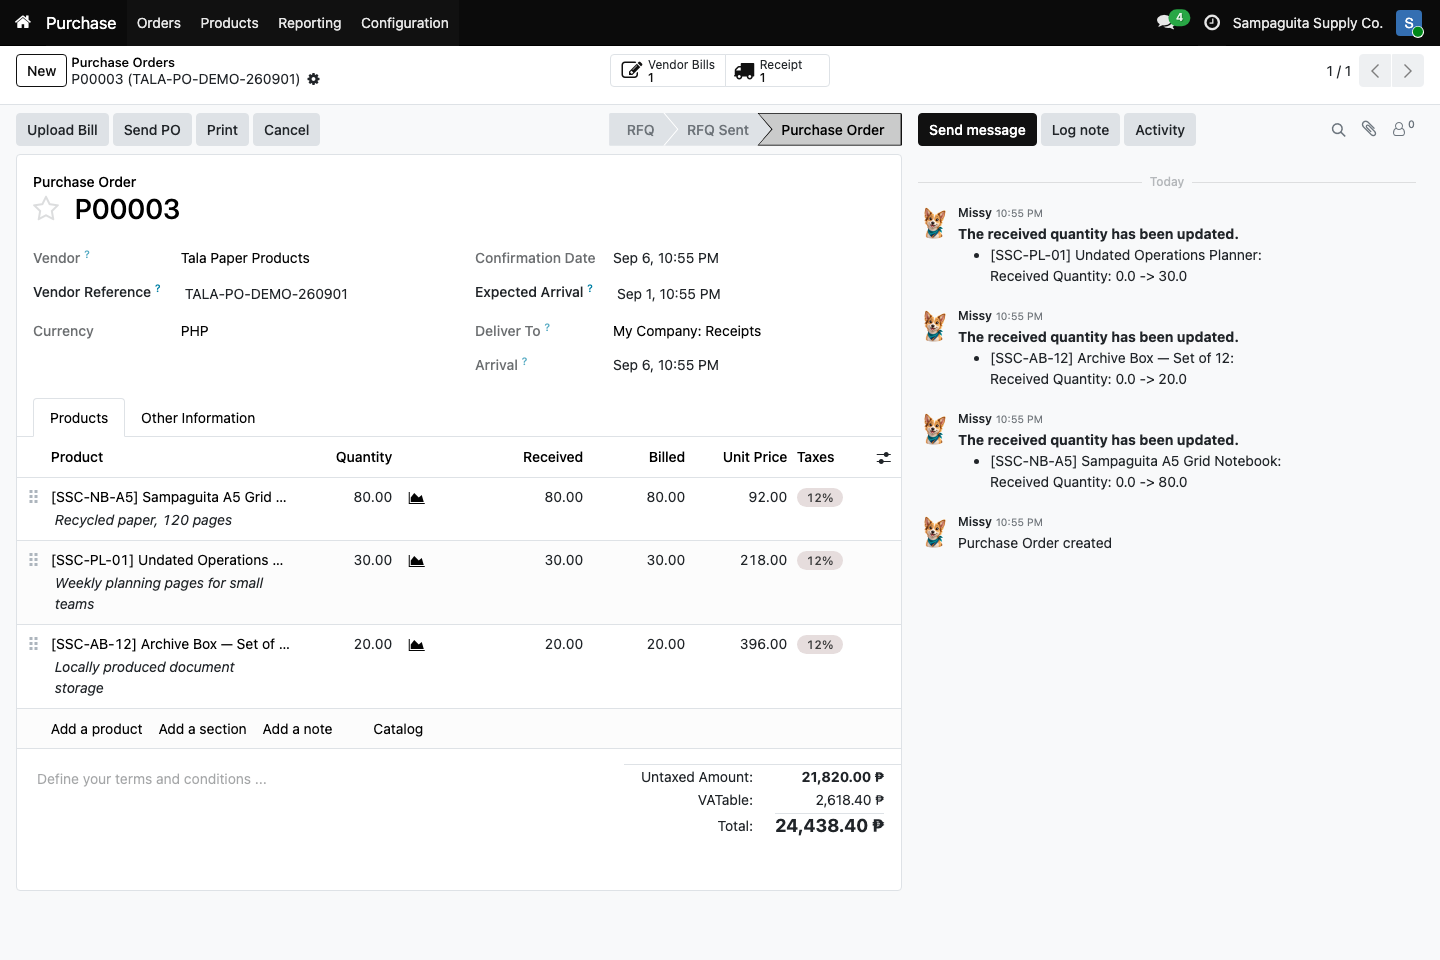
Confirmed purchase order P00003 in the approved fictional demo company.
Its smart buttons connect the order to a receipt and vendor bill. Open the
image for the full-resolution original. This is a separate example from RFQ
P00004 above; confirming an RFQ normally keeps its number.
You should now see: Purchase Order as the active stage, received and billed quantity columns, and Receipt and Vendor Bills smart buttons. Check each linked record before treating it as complete or paid.
3. Receive what arrived
Warehouse users open the receipt and compare the supplier, source document, products, expected quantities, and actual delivery. Enter the quantities that physically arrived. Do not validate missing or damaged goods as received. Use the backorder choice for quantities still expected, following your process.
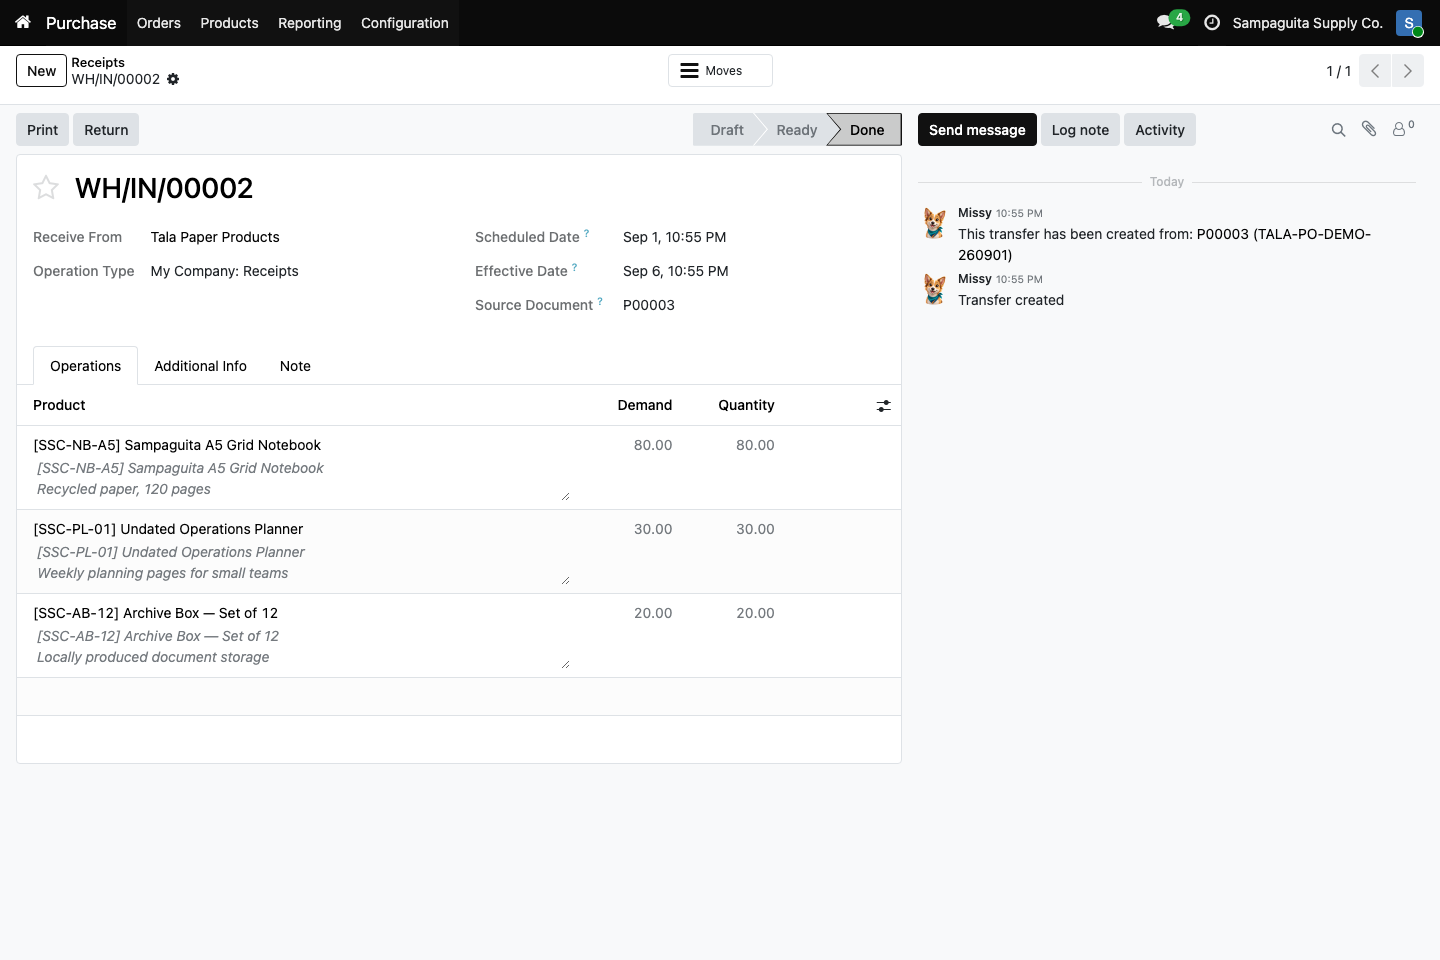
Completed incoming receipt WH/IN/00002 from purchase order P00003
in the approved fictional demo company. Open the image for the
full-resolution original.
You should now see: Done as the receipt status, the supplier, operation
type Receipts, source document P00003, and matching demand and completed
quantities. This proves this incoming receipt only; it is not a customer delivery.
4. Check the supplier bill
Create or open the Vendor Bill according to the approved billing control. Verify vendor, bill reference, dates, products, taxes, quantities, and prices. Compare the bill with the purchase order and receipt. Post only after differences have been resolved or approved.
5. Pay and reconcile
Record payment using the correct bank or cash journal and payment date. Match
the payment with the open supplier bill. The fictional demo uses P00003 for
the confirmed order, WH/IN/00002 for its receipt, and a linked vendor bill.
Keep preparation, approval, receipt, bill validation, and payment access separate when your organization requires that control.